We have always had such pleasure in growing our own vegetables and growing your own garlic is just as satisfying. Garlic is relatively simple to grow if you feel inspired to have a go. There is nothing like eating food you have grown yourself. We recommend a couple of websites full of great information on garlic.
Australian Garlic Industry Association
When to Grow
It depends on the variety of your garlic. Our variety of garlic Italian Late is well suited to our farm in Victoria, and is planted between April to mid June and harvested in December.
The website Australian Garlic provides excellent details on Australian garlic varieties, such as which varieties suit which regions, bulb size, flavour, storage times, resistance to disease, planting and harvesting times.
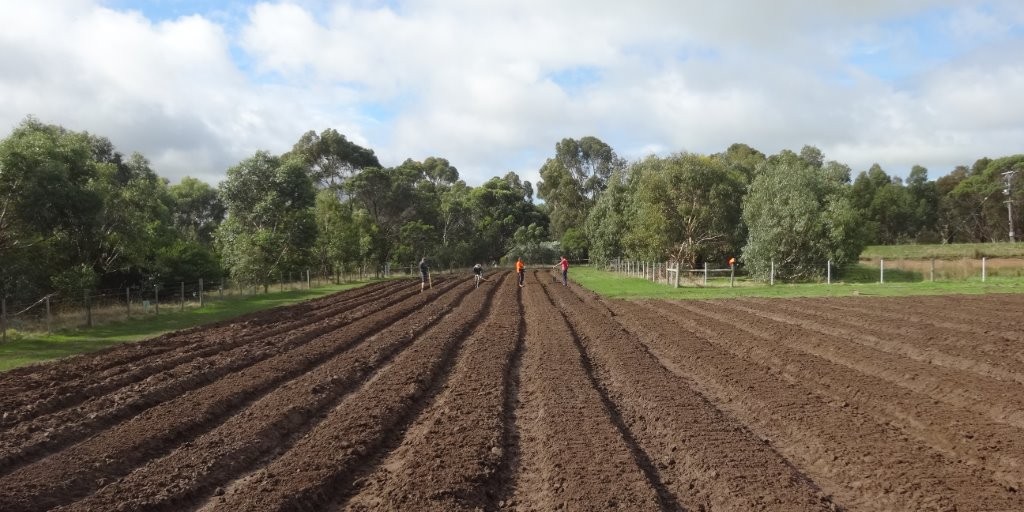
Chose your site
- Choose a planting site in full sun with good ventilation. A garden corner, or a 60 cm or bigger pot, or a raised bed or a whole paddock.
- Prepare the soil a few weeks before planting, aim for a neutral pH 7 of well drained loose soil with good organic matter.
- We use raised beds to ensure the garlic don’t get wet feet. If the roots become waterlogged, the garlic bulb doesn’t grow very well or rot.
- NB Don’t forget to rotate between growing beds/pots every year
Choose your garlic
- Buy seed stock that has not been grown with pesticides and herbicides, or treated with a chemical to extend shelf life and stop it sprouting. Source garlic that you know is suited for your region. You can buy certified organic garlic for planting from Freshwater Creek Garlic.
- You are looking for a garlic bulb in good condition, free from disease or damage.
- To plant, take a whole bulb and break carefully into individual cloves. Leave the papers on.
- You are ready to plant your garlic. Some social media pages suggest placing cloves in the fridge before planting to get it to sprout. This not required unless you live in a tropical climate. Our garlic is not sprouted before it is planted. Another social media suggestion is to soak your cloves in a liquid fertilizer before planting. We don’t do either of these and our garlic grows very well. It’s all about the soil and good quality cloves suitable for the region where you want to plant your garlic.
Planting
- Select the fattest biggest cloves to plant. Use the skinny ones for cooking.
- Hold one clove between your finger and thumb, with the pointy end up, and push into the soil, with the top of the clove about 1 cm below the surface.
- Plant 15 cm apart.
- Mulch down the garlic bed well with pea straw or similar to help keep the soil moist and reduce the amount of weeds growing. A good couple of inches of pea straw on top of the bed. The garlic seedling will grow up through the pea straw quite happily.
- KEEP the garlic bed free of all weeds. Garlic hates competition from other plants and competition will impact the bulb size.
Growing
- Depending on your rainfall over winter and into spring, water as necessary. Garlic needs water, even though it doesn’t like its roots sitting in water – so keep moist.
- Fertilise 2 or 3 times early in the growing cycle with an liquid fertiliser to help develop a robust plant .
- The garlic will shoot and then grow the stem and leaves.
- The bulb swells underground, much later in Oct/Nov.
- Clove separation occurs last in Nov/Dec.
- You don’t need to water your garlic for the last 2-3 weeks prior to harvest.
Harvesting
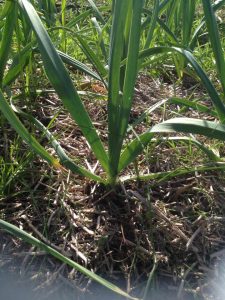
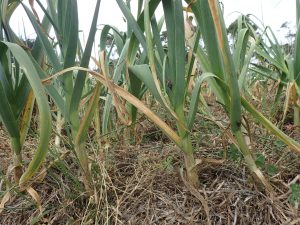
- The plant will be maturing when the leaves start dying back in late Nov-December. The photo below shows garlic leaves beginning to dry off. Look for dry, brown lower leaves with a few of the top leaves still green for a sign that the bulbs are almost ready. Trying to guess when it is ready to harvest is always tricky so we recommend trying this method, from early December onwards.
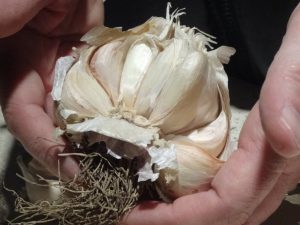
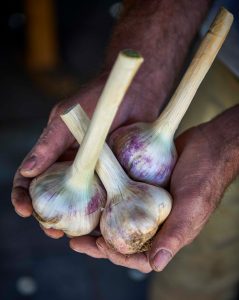
- Carefully dig down the side of the stalk with your fingers to expose the bulb without disturbing the roots, then re-cover with soil when the inspection is finished. You are looking for the formation of the cloves into clear separated bumps. You will be able to see the separate clove shape and feel the bumps when the garlic is ready. The 2nd photo below is our very best garlic so don’t be disappointed if your bulbs are smaller than this, we have lots of smaller ones too. The bulbs have been cleaned and trimmed, but it gives a good example of the clove separation you are looking for.
- To harvest, carefully lift from underneath with a garden fork and pull gently by the stem. Gently brush off the soil and debris.
- NB Don’t leave the bulbs in the ground too long. Garlic left in too long tends to split, allowing soil, moisture and potential disease to get into the cloves.
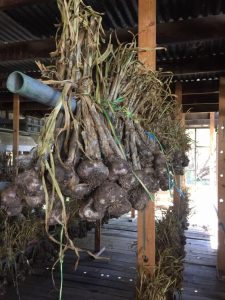
Curing & Storing
- To cure your garlic, hang in loose bunches in an airy place, out of the sun. Make sure there is plenty of air around the plants to help the drying. You can trim the roots and leaves if you like.
- Curing can take 4-6 weeks (depending on humidity) for the papers to dry on the outside of the bulb, sealing in each clove.
- Of course your garlic can also be used “green” so you don’t have to wait! When green, the flavour can be more punchy, but during curing, the flavour becomes more rounded and deeper.
- Once the garlic has cured, store in a light, dry, well-ventilated space such as the shed, garage or veranda, but out of direct sunlight.
- Lastly, don’t store in the dark and cold – the garlic will thinks it’s time to spout and the storage time is reduced.